There’s something undeniably satisfying about biting into a perfectly crispy, golden chicken nugget-the kind that delivers a symphony of crunch followed by tender, juicy chicken inside. While fast food joints have long dominated this beloved snack, making your own chicken nuggets at home can elevate the experience to a whole new level of deliciousness. In this article, we dive into the art of crafting Crunchy Bliss: an easy homemade chicken nuggets recipe that combines simple ingredients, straightforward techniques, and a dash of culinary magic to bring that crave-worthy crunch right to your kitchen. Whether you’re cooking for family, friends, or just treating yourself, this recipe promises a finger-licking good time with every bite.
Crunchy Bliss: Easy Homemade Chicken Nuggets Recipe begins with mastering the art of crispy perfection, balancing texture and taste in every bite. The secret to ecstatic crunch lies not only in the coating but also in selecting the optimal chicken cuts that promise juicy tenderness beneath that golden crust. From there, the preparation unfolds effortlessly, inviting you to create quick and delicious nuggets that crave no complicated technique. Finally, elevating your snack experience with rich dipping sauces and thoughtful serving ideas completes this culinary journey.
Prep and Cook Time
- Preparation: 20 minutes
- Cooking: 15 minutes
- Total Time: 35 minutes
Yield
Approximately 24 tender, crunchy nuggets (serves 4)
Difficulty Level
Easy – Perfect for home cooks of all skill levels
Ingredients
- 2 lbs boneless, skinless chicken thighs or breasts, cut into 1.5-inch pieces
- 1 cup all-purpose flour, sifted
- 1 tsp smoked paprika
- 1 tsp garlic powder
- 1 tsp onion powder
- 1/2 tsp cayenne pepper (optional, for a gentle heat)
- 1 tsp kosher salt
- 1/2 tsp freshly ground black pepper
- 2 large eggs, beaten
- 1 cup panko breadcrumbs – for maximum crunch
- 1/4 cup grated Parmesan cheese (optional, enhances flavor)
- Vegetable oil or peanut oil, for frying
Instructions
- Prepare the Chicken: Pat chicken pieces dry with paper towels to ensure the coating adheres well. Opting for thighs adds extra juiciness, while breasts provide leaner bites.
- Season the Flour: In a shallow dish, combine sifted all-purpose flour, smoked paprika, garlic powder, onion powder, cayenne pepper, salt, and black pepper. Whisk thoroughly to distribute evenly.
- Set up a Dredging Station: Place the beaten eggs in a bowl. In another dish, mix panko breadcrumbs and Parmesan cheese. The panko delivers that signature crunch that makes these nuggets unforgettable.
- Coat the Nuggets: Dip each chicken piece into the seasoned flour, shaking off excess, then into the eggs, and finally coat it thoroughly in the panko mixture. Press gently to ensure an even layer that bakes or fries to a crispy shell.
- Heat the Oil: Pour oil into a deep pan or fryer until about 2 inches deep. Heat to 350°F (175°C). Use a thermometer for crispest results – too low and the nuggets will be greasy; too hot and the exterior burns before cooking through.
- Fry the Nuggets: Carefully place a few nuggets in the oil without overcrowding. Fry until golden brown and crispy, about 4-5 minutes, turning once for even color. Remove with a slotted spoon and drain on paper towels.
- Keep Warm and Serve: To maintain crunch, place cooked nuggets on a wire rack rather than stacking them. Serve immediately for best texture.
- Optional Baking Method: For a lighter version, spray the coated nuggets with oil, spread on a parchment-lined baking tray, and bake at 425°F (220°C) for 15-18 minutes, flipping halfway.
Tips for Success
- Chicken Choice: Dark meat such as thighs yields juicier nuggets with a richer flavor; breasts offer more lean protein but dry out quickly if overcooked.
- Coating Crunch: Panko breadcrumbs are your friend – they create that coveted crunchy texture better than regular breadcrumbs.
- Oil Temperature: Maintaining consistent heat during frying prevents soggy or greasy nuggets.
- Make Ahead: Nuggets can be assembled and refrigerated for up to 4 hours before cooking, making this recipe perfect for meal prep or entertaining.
- Flavor Variations: Add fresh herbs like thyme or rosemary to the breadcrumb mix for a fragrant twist.
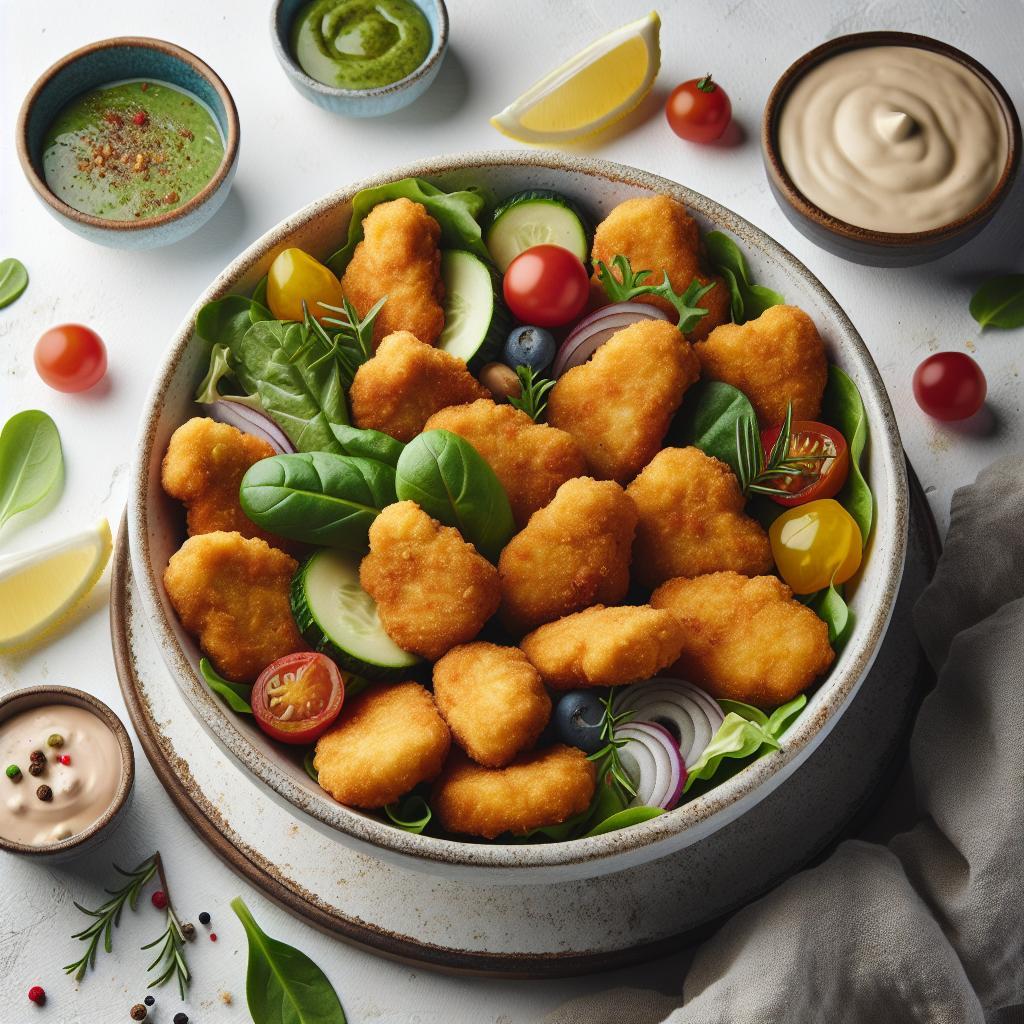
Serving Suggestions and Dipping Sauces to Elevate Your Snack
Present your crunchy chicken nuggets on a rustic wooden platter garnished with fresh parsley or a sprinkle of freshly ground black pepper. Complement the crispy bites with an array of vibrant dipping sauces:
- Classic Honey Mustard: A balanced sweet and tangy sauce that enhances the savory crust.
- Spicy Sriracha Mayo: Mix mayonnaise with sriracha for a creamy kick.
- Garlic Parmesan Aioli: A luscious, cheesy sauce perfect for indulgence.
- Refreshing Yogurt Dill Dip: A cooling contrast that highlights the crunchy coating.
Pair the nuggets with crisp celery sticks, carrot ribbons, or your favorite coleslaw for a satisfying snack or party platter.

Nutritional Information (per 6 nuggets)
| Calories | Protein | Carbs | Fat |
|---|---|---|---|
| 320 | 28g | 18g | 14g |
For those interested in diving deeper into the culinary science behind the perfect crunch, consider exploring this comprehensive guide by Serious Eats. Also, try our Homemade Chicken Tenders Recipe for another delicious family favorite.
Q&A
Q&A: Crunchy Bliss – Easy Homemade Chicken Nuggets Recipe
Q1: What makes these homemade chicken nuggets “crunchy bliss”?
A1: The secret lies in the triple-layer coating! We start with a tender chicken piece, dip it in seasoned flour, then an egg wash, and finally a crispy breadcrumb mix. When fried or baked, this creates a satisfyingly crunchy exterior that gives way to juicy, flavorful chicken inside-pure bliss in every bite.
Q2: Can I customize the seasoning to suit my taste?
A2: Absolutely! This recipe is a flavorful canvas. You can add paprika, garlic powder, cayenne, or even herbs like thyme or rosemary to the flour or breadcrumbs. Feel free to experiment and make your nuggets uniquely yours.
Q3: Is it healthier to bake instead of fry these nuggets?
A3: Yes! Baking reduces the oil content while still preserving a crisp exterior if you use a light spray of oil or an air fryer. This way, you keep the crunch and flavor but cut down on excess fat, making it a heart-friendly comfort food.
Q4: What’s the best dipping sauce pairing for homemade nuggets?
A4: The options are endless! Classic ketchup or honey mustard works great, but for an elevated touch, try spicy sriracha mayo, tangy barbecue sauce, or even a creamy ranch dip. The contrast between the crunchy nugget and a smooth, flavorful sauce is what takes it over the top.
Q5: Can I use other meats or plant-based alternatives in this recipe?
A5: Definitely! The coating technique excels with turkey, pork, or even firm tofu and cauliflower. Just adjust the cooking times to ensure the filling is perfectly cooked through, and you’ll have a crispy delight no matter your preference.
Q6: How far ahead can I prepare and store these nuggets?
A6: You can bread the nuggets a few hours ahead and keep them refrigerated before cooking. If cooked, store leftovers in an airtight container for up to 3 days. Reheat in the oven or air fryer to restore the crunch without drying them out.
This crunchy, flavorful recipe invites you to savor homemade comfort with minimal fuss. Ready to dive into a plate of golden, crispy bliss?
To Wrap It Up
There you have it-your ticket to achieving that perfect golden crunch and tender, juicy bite right in your own kitchen. These homemade chicken nuggets aren’t just a quick fix; they’re a gateway to endless creativity with spices, dips, and sides. Whether you’re feeding a hungry crowd or treating yourself to a comforting snack, this recipe proves that deliciously crispy bliss doesn’t require a drive-through. So roll up your sleeves, gather your ingredients, and get ready to savor every bite of your crunchy creation. Happy cooking!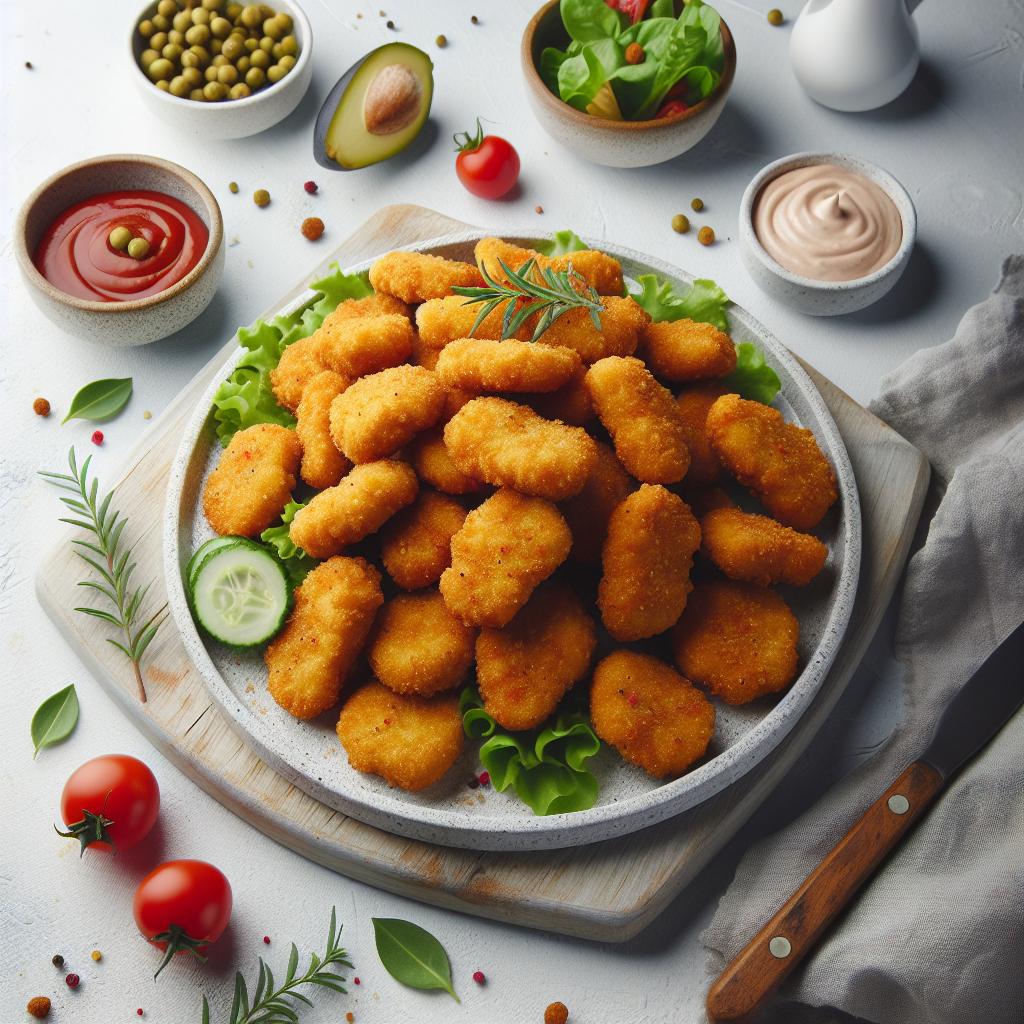


