Imagine turning a tiny seed into a vibrant burst of life right on your kitchen counter-fresh, nutritious, and ready to elevate your meals. Sprouting beans and lentils at home is more than just a simple gardening trick; it’s a journey into the heart of wholesome eating and self-sufficiency. In this article, we’ll unlock the secrets of sprout success, guiding you step-by-step to cultivate your own crunchy, vitamin-packed sprouts. Whether you’re a seasoned gardener or a curious beginner, growing beans and lentils indoors is a rewarding, eco-friendly way to boost your health and bring a touch of green magic to your daily routine. Let’s dive in and watch your sprouts thrive!
- Choosing the Perfect Beans and Lentils for Thriving Sprouts
- Creating the Ideal Environment for Optimal Germination
- Step-by-Step Guide to Soaking and Rinsing for Maximum Growth
- Nurturing Your Sprouts to Crunchy Perfection and Flavorful Freshness
- Prep and Cook Time
- Yield
- Difficulty Level
- Ingredients
- Instructions
- Chef’s Notes – Tips for Success
- Serving Suggestions
- Nutritional Information Per 1/2 Cup Sprouts
- Q&A
- In Conclusion
Choosing the Perfect Beans and Lentils for Thriving Sprouts
Sprout Success: Grow Your Own Beans & Lentils at Home starts with selecting the ideal varieties that promise vibrant, crunchy sprouts bursting with flavor and nutrition. Whether you’re cultivating mung beans, lentils, chickpeas, or adzuki beans, understanding their unique characteristics will elevate your sprouting experience to new heights.
Opt for organic, untreated, whole dried beans and lentils specifically labeled for sprouting to ensure high germination rates and avoid potential chemical residues. Some beans sprout more quickly and yield crisp, tender shoots, while others develop earthier, heartier flavors and textures perfect for salads or stir-fries.
- Mung beans: Fast-sprouting, sweet, and crisp with a mild flavor, ideal for beginners.
- Green lentils: Robust and earthy, these offer a slightly chewy texture and hold up well in recipes.
- Red lentils: Smaller and quicker to sprout but more delicate; best consumed fresh.
- Chickpeas: Create hearty, nutty sprouts that add substance to dishes.
Always avoid old or cracked beans, which may not sprout well or could encourage mold growth, key to ensuring a thriving sprout crop.
Creating the Ideal Environment for Optimal Germination
Establishing the best conditions for sprout germination is essential. Sprouts love warmth, moisture, and airflow. Aim for a consistent temperature of 65-75°F (18-24°C), away from direct sunlight which can dry out your seeds or cause overheating.
Use a clean glass jar or a sprouting tray with proper ventilation to prevent moisture buildup. The environment should be humid but not soggy-think dewy morning garden rather than swampy bog. Regular rinsing and draining are crucial to avoid bacterial growth and to maintain freshness.
Step-by-Step Guide to Soaking and Rinsing for Maximum Growth
- Measure 1/2 cup of your chosen beans or lentils and place them in a large, clean jar.
- Rinse thoroughly under cool, running water to remove any dust or debris.
- Cover with 2-3 times the volume of filtered water and soak for 8-12 hours-overnight is perfect.
- Drain the soaking water through a fine mesh or sprouting lid.
- Rinse and drain the beans 2-3 times daily with cool, fresh water to keep them hydrated and fresh.
- Keep the jar tilted at about a 45-degree angle to allow excess water to drain completely and promote airflow.
- Sprouts will begin to emerge at 24-48 hours; continue rinsing and draining until your sprouts reach desired length-usually 3-5 days.
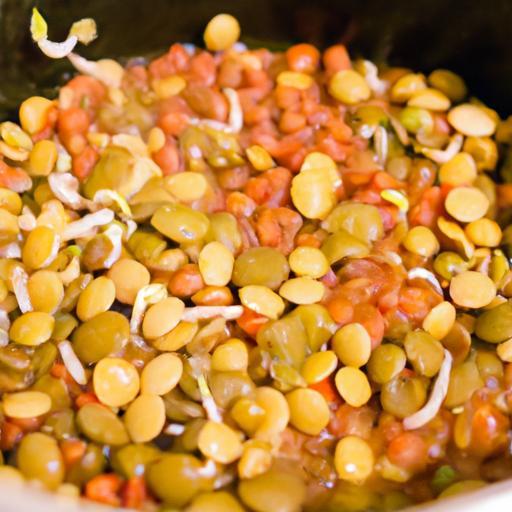
Nurturing Your Sprouts to Crunchy Perfection and Flavorful Freshness
As your sprouts mature, watch as tiny green leaves unfurl, signaling peak flavor and vitality. For the best taste and texture, harvest sprouts when they are plump, tender, and about 1 to 2 inches long. Use clean hands to gently separate them from unsprouted seeds and rinse one last time before storing.
Store sprouts loosely in a container lined with a paper towel to absorb excess moisture and refrigerate for up to a week. Avoid airtight containers as they encourage condensation and spoilage.
The vibrant crunch of freshly homegrown sprouts adds a nutritional punch and a layer of textural contrast to sandwiches, salads, stir-fries, or grain bowls. Experiment with blending varied beans and lentils for complex flavors and beautiful, colorful batches.
Prep and Cook Time
- Preparation: 10 minutes to soak and rinse
- Sprouting: 3-5 days
- Total Time: Approximately 3-5 days (including soaking and sprouting)
Yield
Produces approximately 2 cups of fresh sprouts from 1/2 cup dried beans or lentils.
Difficulty Level
Easy: Perfect for gardeners and kitchen novices alike, requiring minimal equipment and frequent rinsing.
Ingredients
- 1/2 cup organic dried beans or lentils (mung beans, green lentils, or chickpeas recommended)
- Filtered water for soaking and rinsing
Instructions
- Rinse your selected beans or lentils thoroughly under cool running water to remove dirt and dust.
- Soak in filtered water for 8-12 hours, ensuring seeds are fully submerged.
- Drain completely using a fine mesh lid or sprouting jar.
- Rinse and drain your seeds 2-3 times per day. Each time, thoroughly rinse with cool water and drain completely to avoid sogginess.
- Position the jar at a 45-degree angle in a cool, dark spot to maintain good airflow and moisture balance.
- Repeat rinsing until sprouts appear, usually within 24-48 hours, then continue rinsing until the sprouts reach 1-2 inches.
- Harvest your sprouts when tender, rinse well, and store in the refrigerator in a breathable container lined with a paper towel.
Chef’s Notes – Tips for Success
- Variety matters: Experiment with different beans and lentils to discover your preferred taste and crunch.
- Hygiene is key: Always use clean equipment to prevent contamination and spoilage.
- Incorporate herbs: Rinse sprouts with a hint of fresh lemon juice or herbs like dill for a zesty twist.
- Make-ahead tip: Sprouts keep well refrigerated for up to 7 days-prepare several batches for a steady supply of freshness.
- What if sprouts smell? A sour or unpleasant odor means mold or spoilage-discard immediately and restart.
Serving Suggestions
Enjoy your homegrown sprouts raw in vibrant salads or as a garnish on avocado toast and wraps. For a warm twist, toss sprouts quickly in a hot skillet with garlic and sesame oil-sauté only until slightly softened to preserve crunch. Garnish with toasted sesame seeds, a sprinkle of crushed chili flakes, or a drizzle of freshly squeezed lime for an exciting flavor boost.

Nutritional Information Per 1/2 Cup Sprouts
| Calories | Protein | Carbs | Fat |
|---|---|---|---|
| 45 kcal | 4.0 g | 8.0 g | 0.2 g |
Looking to expand your plant-based kitchen? Check out our Ultimate Vegan Kitchen Guide for more inspiring ingredients and recipes.
For scientific insights on sprouting benefits and safety, visit the USDA Food Safety Information on Sprouts.
Q&A
Q&A: Sprout Success – Grow Your Own Beans & Lentils at Home
Q1: What makes sprouting beans and lentils at home so special?
A1: Sprouting is like awakening a sleeping seed-a tiny powerhouse of nutrients bursts to life right on your countertop! It’s not only a fun, hands-on gardening project but also a fantastic way to boost your meals with fresh, crunchy, vitamin-packed delights that you’ve nurtured from scratch.
Q2: Which beans and lentils are best for sprouting?
A2: Mung beans, chickpeas, lentils (red and green), adzuki beans, and mung lentils are all star sprouters. They germinate quickly and keep their mild, nutty flavor that enriches salads, sandwiches, and stir-fries. Just avoid dried beans like kidney or black beans that need extra care before sprouting.
Q3: How do I start sprouting at home?
A3: Simple as soaking, draining, and rinsing! Begin by soaking your beans or lentils overnight. The next day, drain well and rinse twice daily, keeping them in a breathable container like a jar fitted with a mesh lid. Within a few days, you’ll witness tiny tails emerge-your sprout babies ready to energize your plate!
Q4: What conditions help sprouts grow healthy and delicious?
A4: Bright, indirect light with temperatures around 65-75°F (18-24°C) is perfect. Avoid direct sunlight, which can wilt your sprouts, and keep them well-rinsed to prevent mold. Air circulation and moderation in watering create a vibrant sprout environment.
Q5: How do sprouted beans and lentils benefit my health?
A5: Sprouts unlock nutrients and enzymes often dormant in dried seeds, making them easier to digest and richer in vitamins C and B, protein, and fiber. Including sprouts can support digestion, enhance immunity, and add antioxidant power-nature’s own little superfood bombs.
Q6: Can I eat sprouts raw or should I cook them?
A6: Both ways work! Raw sprouts add crunch and freshness to salads and sandwiches. If you prefer, lightly steaming or stir-frying preserves their crunch while making them gentle on the stomach. Just remember to always rinse thoroughly to ensure cleanliness.
Q7: Any tips for avoiding common sprouting pitfalls?
A7: Absolutely! Prevent mold by rinsing sprouts diligently and ensuring they drain completely. Use clean jars and fresh water. If any sprouts look slimy or smell off, toss them out-better safe than sorry in your sprout adventure.
Q8: How long does a sprouting cycle take?
A8: Typically 3 to 7 days! Lentils might be ready in about 2-3 days, while some larger beans like chickpeas take closer to a week. Keep an eye on their size and crunchiness-it’s a delicious countdown you’ll love.
Growing your own sprouts transforms simple beans and lentils into a garden of vibrant nutrition. Ready to sprinkle some green magic on your meals? Happy sprouting!
In Conclusion
Growing your own beans and lentils at home is more than just a gardening project-it’s a journey back to nature’s simplest, most nutritious gifts. With a little patience, some care, and the right know-how, you can transform tiny seeds into vibrant, crunchy sprouts that enrich your meals and your well-being. Whether you’re a seasoned green thumb or just starting out, embracing sprout success brings a rewarding burst of life and flavor to your kitchen. So why wait? Grab those seeds, nurture your sprouts, and watch your homegrown goodness flourish-one tiny bean at a time. Happy sprouting!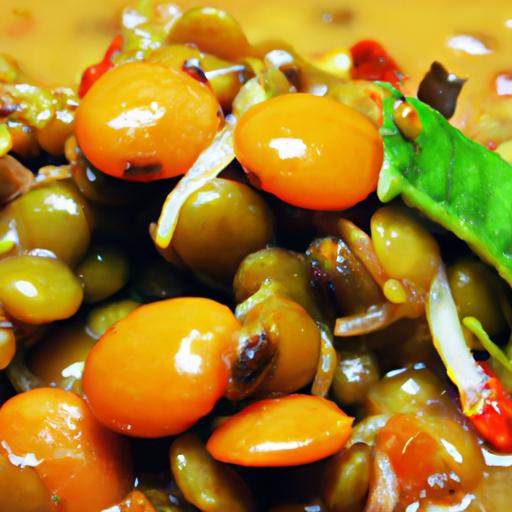


